Untitled-1-2-6-2
Showing posts with label cooking. Show all posts

Saturday, March 3, 2012

White Chocolate Truffle Cupcake Heaven


I am not exaggerating when I use the word "heaven" to describe these cupcakes. Flannery, my not-so-little sister, is pretty much obsessed with cupcakes (as am I) and whenever I come home, I am pretty much guaranteed a new tasty recipe. This time around, it was White Chocolate Truffle Cupcakes. Now, of course, we found this recipe on Pinterest via The Pampered Chef (where else do you find recipes these days?), but Flan put her own spin on the recipe and it was seriously amazing and death by white chocolate. 

Now, I must admit, although I'd love to take credit for baking these cupcakes, I just can't. I really was just standing there taking photos of Flan while she did all the work (and also yakking (sp?) away and talking about weird things and annoying her - it's what I do best!). That said, check out this heavenly (but also so sinful - ha!) recipe.

The Recipe?
White Chocolate Truffle Cupcakes

Ingredients?

CUPCAKES
1 box of white cake mix
3 eggs (egg whites only!)
1 1/4 cup of water
1/2 cup butter
Round white chocolate truffles unwrapped

FROSTING
6 oz. white chocolate chips
1 8oz. package regular cream cheese, softened
1/2 stick of butter (1/4 cup), softened
1/2 tsp vanilla
2 cups powered sugar

Instructions?
1. Gather your ingredients & preheat oven to 325 degrees.


2. Mix cake mix, eggs (no yolks!), butter, & water.


3. Bake cupcakes 17-20 minutes at 325 degrees. 


4. While cupcakes are baking, unwrap the white chocolate truffles (and pop a few in your mouth while you're at it).


5. Remove the cupcakes from the oven. Immediately snip or scoop out a 1/2 inch deep "x" into the top of each cupcake. Place & press one truffle into each cupcake. Then remove cupcakes from pan and let cool for 30 minutes. 


6. During this 30 minute cool down, you can snap photos of pretty things and just watch while your sister does all the work - OR, you can help her make the frosting. I chose the former, duh.


7. Microwave the white chocolate chips on high for 1- 1 1/2 minutes or until the chocolate is mostly melted (stir every 30 seconds). In large bowl, combine melted chocolate, cream cheese, butter & vanilla. Beat on medium speed until well blended. Slowly add powdered sugar and beat well. Oh yeah, don't forget to give your lazy sister a beater to lick.


8. Using the handy "cut a hole in the corner of a freezer bag" method, frost your cupcakes. 


Voila! And there ya have it. Heaven in a cupcake. Enjoy! 

Saturday, September 24, 2011

Pumpkin: Red Velvet's Tastier, More Elusive Cousin


Your favorite guest blogger is BACK! Meghan Diamond, the Red Velvet Extraordinaire turned Autumn Enthusiast, will be sharing with us the wonders of pumpkin bread and roadtrips during our favorite season of the year: FALL.
I know you guys missed her. I sure did. Take it away, Meghan....

Today is my first day back home after a rowdy weekend in Austin so naturally I decided to catch up on blogging instead of cleaning or running errands or being productive. Plus, listening to The National (aka the best band ever) puts me in good mood. And since I’m on the topic of good moods, I will be writing about my absolute favorite time of the year: Fall. It’s strange that I love autumn so much considering that I grew up in Florida and now live in South Texas. We don’t really get a real fall until winter comes around. But I think the feeling comes from knowing that the summer weather is finally going to end and the holidays are right around the corner.  Throughout college, MC and I planned fall trips, usually to either Nashville or North Carolina. We loved the cool weather and beautiful foliage, not to mention that road trips just make us happy. And for every road trip I always stayed up late, baking pumpkin bread and not studying for whatever important nursing school exam I had at 730 the following morning.

So on Thursday night, in keeping with tradition, I stayed up until 4am baking pumpkin bread and watching Garden State (aka the best movie ever). I then woke up at 8am and made the 3 hour drive to Austin, ate a slice of the delicious bread, and then proceeded to spend the next 10 hours sweating, walking wayyy too much, and seeing some really awesome live music at Austin City Limits. This trip wasn’t quite a normal fall trip considering it was 90-something degrees the whole time but I switched things up this year, including my pumpkin bread recipe. 

I usually stick with basic pumpkin bread and then make one loaf with chocolate chips and maybe some walnuts or pecans (this one is always my favorite because of the chocolate, duh) and the other loaf with dried cranberries or cherries and maybe some walnuts. They are always moist, delicious and so so pumpkiny (please excuse my bad habit of making up words). This is my typical recipe that I took from a Taste of Home cookbook and can also be found here. Its perfectly simple and delicious and I highly recommend making it.

I’ve been making that recipe since I was in high school, however, since then I’ve discovered Pinterest. Remember my last guest post where I drooled over Pinterest the entire time? Well nothing has changed since then, I’m still obsessed and, fortunately, it has expanded the horizons of my love for pumpkin baked goods. I recently came across this recipe (I won’t post the actual recipe because the blog is super cute and definitely worth checking out). It’s cream cheese rippled pumpkin bread and it is amazing. It’s slightly less pumpkiny than the previous recipe but I don’t even care. My boyfriend could not stop eating it all weekend - believe me when I say this is a big deal since he is very picky about what baked goods he eats. And when I say picky, I mean he doesn’t like too much chocolate...we’ve been going to couples counseling regarding this issue because it’s been a major source of stress in our relationship (for obvious reasons).

Seriously, you want this. Make it. Now.

Since I seriously got carried away with the whole pumpkin thing this week, I also made vegan pumpkin cupcakes for a patient of mine who is vegan. We always have trouble getting her favorite foods because our cafeteria doesn’t carry many vegan options so I started bringing her vegan baked goods. They were a big hit. I made vegan icing by mixing half a tub of tofutti “cream cheese,” a few tablespoons of Earth Balance margarine, 1.5 cups powdered sugar, some vanilla, and cinnamon. Don’t be scared of vegan baking, its usually just as good (and sometimes better) than non vegan baked goods I promise!


Then since I was seriously stressed about working 3 nights in a row, I made myself some cookies with all the leftover pumpkin in my fridge. I added chocolate chips (duh) because that was all I had in my pantry but I froze some leftover batter to bake when I get some dried cherries because dried cherries and pumpkin are the best combo.

Pumpkin overload? Nah, there’s no such thing. Plus it has lots of Vitamin A, which is good for you. It’s also just good for your mental health because how could pumpkin or the fall season not make anyone happy?

And just in case nobody believes how much MC and I love fall, just take a look at our excitement during this trip to Nashvegas back in 2009:


We also get really excited about being at dueling piano bars in the fall but that is completely unrelated and any photo evidence would probably be embarrassing. Except for this...


....That’s not at all embarrassing.

Want some funky fall decor tips? Check out my guest post on Meghan's blog!

Sunday, September 4, 2011

Two (Yes, TWO) Ingredient Pumpkin Cake

I know what you are thinking. TWO ingredients? Yeah right. Well, believe it or not --  it's true. I stumbled upon this cake on pinterest (via The Big Red Kitchen blog) and knew this had to be my next creation because a) I'm not an avid/very good baker so, uh, yeah, two ingredients? love it b) I LOVE PUMPKIN ANYTHING and c) It's September! Which means I am basically required to create fall-inspired dishes such as this one. I'm home at my parents' house for the weekend, so I figured it was the perfect time to experiment with the people who would give me their honest opinion on this two-ingredient dessert. Needless to say, it was a HIT. 

The Dish?
Pumpkin Cake

The Ingredients?
1 Boxed Cake Mix
1 15-oz. Can of Pumpkin
Frosting/Glaze - optional

The Directions?
1. Mix pumpkin and cake mix on medium speed for two minutes.*
2. Pour into a greased 7 x 11 pan. 
3. Bake at 350 degrees for 28 minutes. 
4. Remove from oven -- let cool.
5. Glaze or frost as desired! 

*This cake created with the above directions is undoubtedly delicious - BUT, I think next time I'd experiment by adding raisins, walnuts and a pinch of pumpkin spice! 

Sunday, July 17, 2011

Roasted Butternut Squash Pizza

Roasted butternut squash pizza is arguably the most heavenly pizza known to mankind. It sounds like an exaggeration, but just you wait until you try it yourself one day. Maybe you'll even be inspired to make your own after this post! The first time I laid eyes and tongue (ew?) on butternut squash pizza was when I was in Burlington, VT last Halloween weekend with my Aunt Carrie and Uncle Funny Jeff (he's really funny). The leaves were just about done changing, and there were snow flurries in the air. College kids were out and about on the streets dressed in their (hilarious) costumes - probably freezing - as were we. We were on the hunt for a tasty eatery that was unique to Vermont where we could relax, warm up, and enjoy our evening. We settled on American Flatbread, a wood-fired pizza grill, and also the most warm, cozy, perfect place to spend the evening on a cold Halloween night. You just might be able to guess what comes next. We ordered butternut squash pizza! Which was very appropriate considering the time of year. I do believe we also ordered a squash-based beer - which was surprisingly good. At first bite, we all fell in love. Maybe it was the cozy atmosphere, maybe it was because we were famished from traveling, or maybe...just maybe...it was because butternut squash on a pizza was meant to be. I don't remember what exactly was on that pizza. I just know it was a tasty schmorgesborg of cheeses, onions, herbs and squash. I'd also just like to say, that after that meal, we were completely rejuvenated and went to an authentic irish pub and had some beeahs. SUCH a fun night. But I digress. After coming home from that trip, my Aunt Carrie and I knew we had recreate that fine dish - and again, I don't know exactly what ingredients we used, but all I know is that it turned out just as good, and quite possibly better, than in VT.

As I was searching for a fun, tasty, yet challenging dish to make on my day off, roasted butternut squash pizza magically popped into my head and I knew I had to make it and share it with the blogging world. I did a little search and found a great recipe by Two Peas and Their Pod for roasted butternut squash pizza. I followed her recipe more or less, but also followed my own intuition when making this pizza pie.

First of all, you always need a little pre-dinner, cooking entertainment. That's why I turned to Mr. Jimmy Fallon, my future husband (after he divorces his current wife) for some laughs to keep busy for what seemed to be for-ev-er. If you haven't watched Late Night with Jimmy Fallon, I highly recommend it.
The Dish?
Roasted Butternut Squash Pizza

The Ingredients?
  • Pizza dough - I cheated and got the store-bought.
  • 1 Red Onion
  • 1 Butternut Squash
  • Mozzarella Cheese
  • Feta Cheese
  • Olive Oil
  • Garlic, 1-2 tsp minced
  • Fresh Rosemary

The Directions?

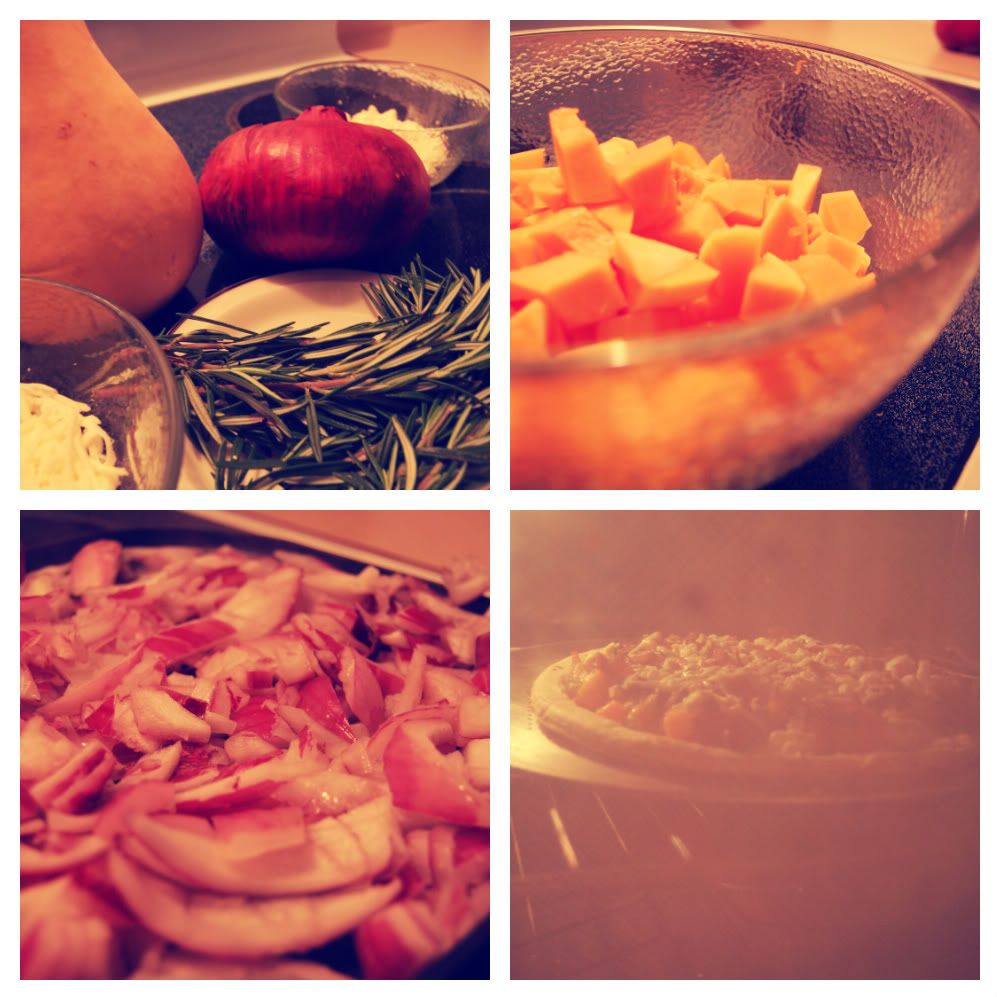
1. Peel and dice your butternut squash. WARNING: This takes a lot more manpower and strength than you think. Make sure you have a strong knife and solid cutting board. OH - and MUSCLES.
2. Preheat your oven to 400 degrees. Place diced squash in a pan, drizzle with olive oil and sprinkle with salt and pepper. Once the oven is preheated, let the squash roast for 40-50 minutes, stirring occasionally.
3. Chop that red onion, and hold back those tears.
4. Get ready to carmelize your red onion. Place a skillet or pan on medium-high heat and drizzle with oil. Once the oil is shimmering, throw those onions on there. The only difference between carmelizing an onion and grilling an onion is that you add a teaspoon or two of sugar. Don't know how to grill/carmelize an onion? Here's a little help. The grilling/carmelizing should take 15-20 minutes. This would be a good time to make that pizza dough, if you are not lazy like me and want to make your own crust.
5. Once the onions are done carmelizing and the squash is done roasting, top that pizza! It doesn't matter what order - I did a little mozzarella, then the squash, then a little garlic, then the onions, then the rosemary, and then the feta, and then a little more mozzarella. Hey, what's a pizza without lotsa cheese, right?
6. Finally, raise that oven temperature to 450 degrees. Once it hits the 450 degree mark, lower the temperature back down to 425 degrees and put that pizza in there. I kept my pie in there for 10 minutes - but that's because I don't like super crispy crust. If you like crispy crust, I recommend 13 minutes or so. Just watch - when the crust is golden brown and the cheeses are all melted and gooey and delicious, you'll know the pizza is ready.
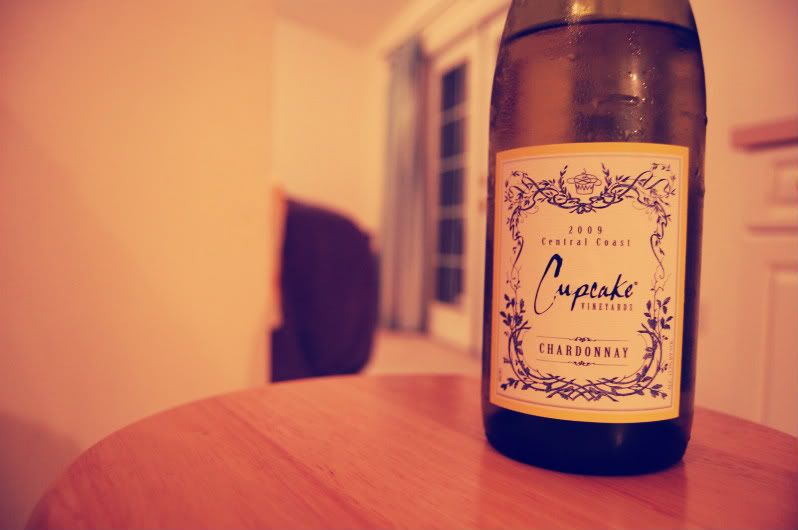
7. Finally, enjoy your creation! I chose some Cupcake Chardonnay to accompany my pizza. What. A. Pair. The only reason I picked it up was because when I was Houston, Meghan and I were totally intrigued by it, mainly because it has a dessert in it's name. We bought it, brought it home, and chilled it - in the freezer. Then...oh yeah, we forgot about it. And guess what? It exploded. True story. Needless to say, we did not get to enjoy our Cupcake wine and I've been dying to try it ever since! Meghan's quite the cooker, too. Check out her post on how to make risotto!
Bon Appetit!

Saturday, July 2, 2011

Red Velvet: A Love Affair

'Allo Puppets. I am in Houston. With THE Meghan Diamond. We love blogging. A lot. So much so that we are spending our Saturday night in Houston at the most awesome coffee shop on the planet - Brasil - and we are...you guessed it...blogging. Being that we are at the most awesome coffee shop on the planet, and we are drinking the most awesome drinks on the planet (soy mochas), we knew we had to do some super awesome blogposts, so we had the super awesome idea of guest blogging! Or as I like to call it: Celebrity Blogging. So, without further adieu, I'd like to introduce our celebrity blogger of the evening....Meghan Diamond! Meghan Diamond, an avid baker who should probably quit her job as a nurse an open a bakery full-time, will be introducing us to the fascinating world of Red Velvet. Red Velvet holds a special place in both of our hearts and most definitely deserves a whole blogpost dedicated to it - duh.
The Red Velvet Extraordinaire, Meghan Diamond

For all of you out there who want to meet the rebel girl who is messin' with Texas when everyone says not to, check out her blog!

HEY Y'ALL. I'm Meghan and I'm from Texas where everything  is bigger, we love guns, and ride horses everywhere. Basically all I wear are cowboy boots and jeans. Actually none of this is true. Well it does apply to some Texans, but definitely not me. Ironically though, as I write this I am wearing cowboy boots with jean shorts, I promise this does not happen very often. Just wanted to clear all that up. So now that I've introduced myself I'll get to the point. I love dessert. Like for real I could eat it for breakfast, lunch, and dinner and sometimes I do. Please don't tell my mom because she thinks I finally got out of my ice cream for breakfast phase. Obviously since I love sweets I also enjoy baking them. I bake wayyy too much, sometimes I can't sleep after working all night because I'm thinking of the awesome things I'm planning to bake when I wake up. Its a problem. MC and I share a common bond in our love for red velvet cupcakes with cream cheese frosting, I'm not even sure love is a strong enough word. We actually both planned to marry them. Zach Braff and DD iced coffee were a bit upset because we were both engaged to them as well but how could we resist that rich red color, and the cake actually feels like velvet in your mouth, and cream cheese frosting, its the absolute perfect complement to something so divine. Ok I sound a bit nuts, I'll stop.

So red velvet cake has become pretty popular over the last 5 years, especially with the recent cupcake fad (yes they are a fad). Despite this many people don't know what red velvet is. No it's not red food dye in white cake, that just makes a pink cake. Great for a kid's birthday party, not good enough for me. Yes, I'm a bit of a dessert snob which is why I refuse to use boxed mixes. But I digress. Red velvet is actually cake with red food dye (a lot of it) and a little bit of cocoa powder. Not enough cocoa to make it chocolate, but enough to give a good flavor and that deep red color that we all love. But lets be realistic, cake is kind of time consuming to make and its hard to transport and serve unless you're at a wedding or birthday. Fortunately you don't have to have just red velvet cake, oh no, there is a whole world of options out there for you. Ever heard of pinterest? You probably have, and you're probably obsessed with it, everyone is. Pinterest is the absolute best way to find recipes, blogs are another good way, and most pinterest pictures come from blogs. I may have to marry Pinterest as well. Sorry red velvet cupcakes, I'll always love you, I just feel like there's more out there for me.

So without further ado I have some food porn for all of you...

Red velvet cookies made from scratch. Sandwiching optional.

Red velvet brownies. I made these, they're amazing. I ate some for breakfast this morning. Although I made cream cheese icing and skipped the frosting, but I'm sure its delish as well.

Red velvet fudge. I need it.


Red Velvet cheesecake brownies. OMG.

Of course the new fad is cake pops. Probably America's way of attempting to control portion size by making a small serving of dessert look cute and trendy. Too bad I would still eat like 10 at a time. But they really are so tiny and precious.

And for the grand finale, a new spin on my first love: Red velvet cupcakes...in a jar. How cute, I'm in love. I'm also obsessed with mason jars, but that could be an entirely different post in itself.

OK I'm exhausted. That was a lot of red velvet for one blog post. Seriously, I worked up an appetite. I may need a snack and cafe Brasil has some delicious desserts...

Monday, May 23, 2011

Arroz con Camarones, Por Favor

At the request of the ever-changing tastes of Senor Dan Curtis, I decided to attempt a latin dish over the weekend - Arroz con Camarones aka Rice with Shrimp. We decided yellow rice was mucho tastier than plain ole white rice, so I began to search for recipes with yellow rice and shrimp. There is so much variety out there! There are Cuban recipes, Puerto Rican recipes, Spanish recipes - and, frankly, they all looked so delicious. I finally settled on one that didn't look too complicated, but one that had just enough difficulty involved in the process to feel proud eating it.

The dish?
Arroz Con Camarones

The ingredients?
  • 1 lb. of shrimp, fresh or frozen - peeled and deveined
  • 1½ cups of uncooked rice
  • 4 cloves of garlic, chopped
  • 1 cup of onions, chopped
  • 1/2 cup of tomatoes, chopped
  • 1/2 cup of red pepper, chopped
  • 1/3 cup of carrots, chopped
  • 2 cups of water
  • 1/3 cup of oil (vegetable or canola)
  • 1/2 cup of frozen green peas
  • 1/2 tsp turmeric
  • 2¾ tsp of salt
  • 1 tsp of pepper

The instructions?

Begin by chopping the onions, tomatoes, red pepper and carrots. Heat the oil in a large pot, then add turmeric. Add onions and garlic, saute till tender. Add carrots, tomatoes, and carrots. Saute for 10 minutes. Add shrimp, salt and pepper. Saute for another ten minutes or until shrimp is pink. Finally, add the rice, peas, and water. Bring to a boil, then cover and simmer for 20 minutes. Muy delicioso!


    Helpful Tip
    I used brown rice instead of white rice - which required a different ratio of water to rice. For your dish, make sure you use the correct ratio of water to rice! It will save you a lot of time to check that before you begin. I didn't and ended up adding water and waiting, and adding water and waiting. Never again!

Saturday, May 21, 2011

Ma Pa Tofu - Ma & Pa's new favorite!

I think cooking may just be my new favorite hobby/stress outlet. So much has been going on, I've had to scramble to find fun little hobbies that help keep me in check. Cooking is challenging, fun and rewarding! Driving home from work the other day, I suddenly had a craving for a dish my Aunt Carrie made while I lived with her in Boston. It was healthy, delicious and different. I made it on my own once, and then decided to share it with my family. Needless to say, I got perfect tens all around. Thanks, Aunt Carrie!

The dish? 
Ma Pa Tofu

The ingredients?

  • 1 pound (1 package) of firm tofu, cut into six slices
  • 1/2 cup fat free, less sodium chicken broth
  • 2 tbsp low sodium soy sauce
  • 1 tbsp oyster sauce (hoisin sauce can be substituted)
  • 1 tbsp corn starch
  • 1 - 2 tsp chili garlic sauce
  • 4oz. lean ground pork
  • 1 tbsp grated fresh peeled ginger
  • 3 garlic cloves, minced
  • 2 cups hot cooked rice
  • 1/2 cup chopped green onion
  • 1/2 bag of frozen peas (*secret ingredient!)

The instructions? Relatively simple. 
  1. First, slice the tofu into 6 pieces. Place the tofu on 2-3 paper towels on a plate. Cover the tofu with 2-3 more paper towels and another plate. Let tofu sit for 20 minutes. Then, cut tofu slices into 1/2-inch cubes.
  2. In the meantime, mix chicken broth, soy sauce, oyster sauce, corn starch, and chili garlic sauce. 
  3. Heat a large, nonstick skillet over medium high heat & add the ground pork. Cook for 4 minutes or until done.
  4. Add ginger and garlic to ground pork, cook 1 minute. Stir constantly. 
  5. Add tofu. Cook 4 minutes, or until golden, stirring frequently.
  6. Cook & drain half a bag of frozen peas.
  7. Finally, add broth mixture & peas. Cook 1 minute or until thick.
  8. Serve tofu mixture over rice, sprinkle with onions and voila! A tasty asian dish.
I've never been a huge tofu fan (interestingly enough, I used think it was "squishy chicken"),  but this recipe may have just undone years of hatred towards tofu. Let the tofu lovin' begin! 


Serve with a fresh salad, and some white wine, 
and you've got yourself one fine meal.


Sunday, May 15, 2011

Sunday Funday

What better way to spend the most perfect Sunday afternoon than cooking and crafting. With my crazy busy schedule these days, I rarely get time to myself. So when the time comes where I have a few hours to spare, I take full advantage! Today, I decided I'd make one of my favorite dishes. I've only made it once before, and boy, was it a hit. Originally found on my favorite new time waster, pinterest.com, it combines my favorite vegetables to make a schmorgesborg of tastiness.

The dish?
Southwest Black Bean Salad

The ingredients?
  • 1 can of black beans (rinsed and drain)
  • 1 can of whole kernel corn (drained)
  • 1 tomato, diced
  • 1/2 an onion - either red or white
  • 1 avocado
  • 2 scallions
  • 1 tbsp cilantro
  • The juice of 1 lime
  • 3 tbsp extra virgin olive oil
  • ground pepper & salt
  • a few pinches of mexican chili powder

The instructions? Simple.

Combine black beans, corn, tomato, avocado, onion, scallions, and cilantro in a large bowl. In a separate bowl, combine lime juice, olive oil, salt & pepper, and chili powder. Pour lime/oil mixture over veggies. Mix. Voila! A fresh, easy and delicious summer concoction. And great with tortilla or pita chips!