Untitled-1-2-6-2

Sunday, September 25, 2011

Funky Fall Decor - Part II

I really think I may have a problem. It's not anywhere CLOSE to looking like fall or feeling like fall, but I can't stop thinking about fall - and decorating for it! Yesterday, my friend, Kristin, and I had a lovely afternoon of crafting. Now, to be honest, I can't say we are craftiest gals around, nor the most talented, but what we did create? Totally awesome and totally easy. Trust me, if we can do it - you can too! After perusing Michael's for awhile, we finally decided to create three things: a Halloween Wreath, Mod Podge Pumpkins and (dollar store) Fall Candles. 

MOD PODGE PUMPKINS

Necessary items:
  • A Pumpkin (Real or Fake)
  • Mod Podge (glossy)
  • Some sort brush or sponge to apply the Mod Podge
  • 2-3 sheets of scrapbooking paper of your choice
Directions:
  1. Rip your scrapbooking paper into small pieces. If the design on the paper is large, I would recommend ripping large pieces as you'll want be able to see what the original print design was once it's on your pumpkin.
  2. Use your brush or sponge to "glue" each piece of paper to your pumpkin. Be sure to brush the Mod Podge over your paper as well - this will give your pumpkin a glossy look. Note: Once the Mod Podge dries, it will not be visible, leaving only a gloss over your paper.

HALLOWEEN WREATHS

Necessary Items:
  • A Wreath Base: This can be wire shaped into a circle, circle-shaped styrofoam (this is what I used), or a bundle of twigs that can be shaped like a wreath (this is what Kristin used).
  • Your Wreath Decorations: I used orange ribbon to wrap my styrofoam and a black and white ribbon to create a bow to attach to my wreath. Kristin used felt to create flowers to attach to her wreath. Other items I've seen: pieces of fabric tied around a wire to create a "bushy" look, painted letters (BOO or EEK), painted wooden shapes, etc. This is where you can get creative and customize based on what YOU like!
  • Super Glue/Hot Glue + Hot Glue Gun
Directions:
  1. Begin by decorating your wreath base - whether that is wrapping a thick ribbon around it, tying pieces of fabric onto it, or twisting your twigs into the shape of a wreath.
  2. Get out that glue and start adding the accessories! My wreath was relatively easy, but if you'd like to create Kristin's felt flowers, all you must do is cut a long skinny piece of felt, tie a knot at the end of it, and wrap the extra felt around that knot - gluing as you go.


DOLLAR STORE FALL CANDLES

Necessary Items: 
  • Fall Leaves (Real or Fake)
  • 1 tall cylindrical candle from the dollar store
  • 1 tall cylindrical vase from the dollar store (must be thicker than the candle)
  • 1 short candlestick holder from the dollar store (this will be the base of your creation)
Directions:

I will leave this up to 320 Sycamore as she gives wonderful, very easy-to-follow, and detailed directions on how to do this project. Trust me on this one - $4 total will get you the perfect classy fall centerpiece! 


Good luck all you fall crafters you! 

Saturday, September 24, 2011

Pumpkin: Red Velvet's Tastier, More Elusive Cousin


Your favorite guest blogger is BACK! Meghan Diamond, the Red Velvet Extraordinaire turned Autumn Enthusiast, will be sharing with us the wonders of pumpkin bread and roadtrips during our favorite season of the year: FALL.
I know you guys missed her. I sure did. Take it away, Meghan....

Today is my first day back home after a rowdy weekend in Austin so naturally I decided to catch up on blogging instead of cleaning or running errands or being productive. Plus, listening to The National (aka the best band ever) puts me in good mood. And since I’m on the topic of good moods, I will be writing about my absolute favorite time of the year: Fall. It’s strange that I love autumn so much considering that I grew up in Florida and now live in South Texas. We don’t really get a real fall until winter comes around. But I think the feeling comes from knowing that the summer weather is finally going to end and the holidays are right around the corner.  Throughout college, MC and I planned fall trips, usually to either Nashville or North Carolina. We loved the cool weather and beautiful foliage, not to mention that road trips just make us happy. And for every road trip I always stayed up late, baking pumpkin bread and not studying for whatever important nursing school exam I had at 730 the following morning.

So on Thursday night, in keeping with tradition, I stayed up until 4am baking pumpkin bread and watching Garden State (aka the best movie ever). I then woke up at 8am and made the 3 hour drive to Austin, ate a slice of the delicious bread, and then proceeded to spend the next 10 hours sweating, walking wayyy too much, and seeing some really awesome live music at Austin City Limits. This trip wasn’t quite a normal fall trip considering it was 90-something degrees the whole time but I switched things up this year, including my pumpkin bread recipe. 

I usually stick with basic pumpkin bread and then make one loaf with chocolate chips and maybe some walnuts or pecans (this one is always my favorite because of the chocolate, duh) and the other loaf with dried cranberries or cherries and maybe some walnuts. They are always moist, delicious and so so pumpkiny (please excuse my bad habit of making up words). This is my typical recipe that I took from a Taste of Home cookbook and can also be found here. Its perfectly simple and delicious and I highly recommend making it.

I’ve been making that recipe since I was in high school, however, since then I’ve discovered Pinterest. Remember my last guest post where I drooled over Pinterest the entire time? Well nothing has changed since then, I’m still obsessed and, fortunately, it has expanded the horizons of my love for pumpkin baked goods. I recently came across this recipe (I won’t post the actual recipe because the blog is super cute and definitely worth checking out). It’s cream cheese rippled pumpkin bread and it is amazing. It’s slightly less pumpkiny than the previous recipe but I don’t even care. My boyfriend could not stop eating it all weekend - believe me when I say this is a big deal since he is very picky about what baked goods he eats. And when I say picky, I mean he doesn’t like too much chocolate...we’ve been going to couples counseling regarding this issue because it’s been a major source of stress in our relationship (for obvious reasons).

Seriously, you want this. Make it. Now.

Since I seriously got carried away with the whole pumpkin thing this week, I also made vegan pumpkin cupcakes for a patient of mine who is vegan. We always have trouble getting her favorite foods because our cafeteria doesn’t carry many vegan options so I started bringing her vegan baked goods. They were a big hit. I made vegan icing by mixing half a tub of tofutti “cream cheese,” a few tablespoons of Earth Balance margarine, 1.5 cups powdered sugar, some vanilla, and cinnamon. Don’t be scared of vegan baking, its usually just as good (and sometimes better) than non vegan baked goods I promise!


Then since I was seriously stressed about working 3 nights in a row, I made myself some cookies with all the leftover pumpkin in my fridge. I added chocolate chips (duh) because that was all I had in my pantry but I froze some leftover batter to bake when I get some dried cherries because dried cherries and pumpkin are the best combo.

Pumpkin overload? Nah, there’s no such thing. Plus it has lots of Vitamin A, which is good for you. It’s also just good for your mental health because how could pumpkin or the fall season not make anyone happy?

And just in case nobody believes how much MC and I love fall, just take a look at our excitement during this trip to Nashvegas back in 2009:


We also get really excited about being at dueling piano bars in the fall but that is completely unrelated and any photo evidence would probably be embarrassing. Except for this...


....That’s not at all embarrassing.

Want some funky fall decor tips? Check out my guest post on Meghan's blog!

Thursday, September 22, 2011

Oh the Memories...

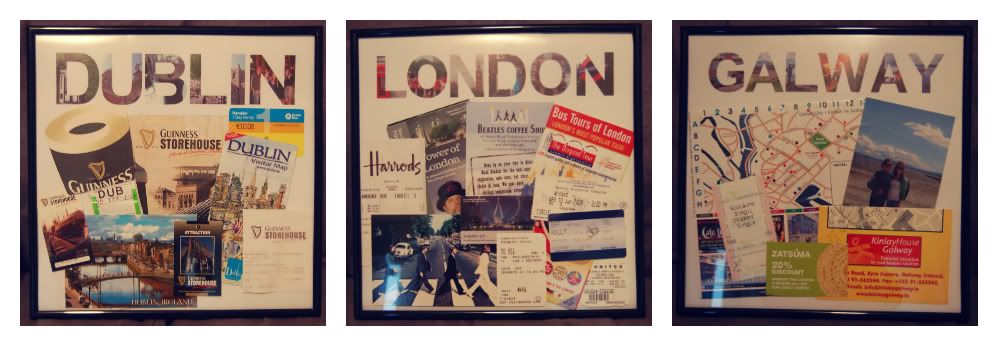
A little over two years ago, my cousins and I ventured across the Atlantic to England and Ireland. Needless to say, we had the time of our lives - and I'm not exaggerating. I would give anything to be able to go back! 

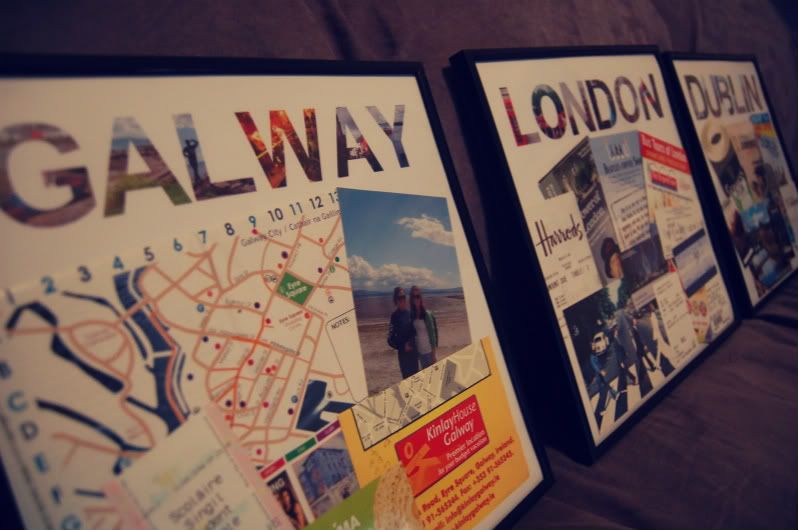
One of the biggest things we made sure to do while we were over there was document our time via journals, but also save every little ticket, receipt, brochure, map, you name it - we saved it. Up until a couple of weeks ago, I had no idea what I was actually going to do with all of those paper memories, until I stumbled upon memory boxes on Pinterest (of course). Immediately, I knew this was the perfect way to display my memories, and keep those treasures in good condition.
Creating a memory box is actually very simple. All you'll need are a few record album frames (or actual shadow boxes - if you're not cheap like me), double sided tape, and your memories. 

1. The first thing you'll need to do is decide how you'll want the names of the cities and/or countries displayed within your frame. I chose to use Photoshop to create letter cut-outs of my pictures taken on my trip. 
2. Once you've printed your city/country name, use that sheet of paper as the base of your creation. Tape any and all receipts, maps, brochures, tickets, luggage tags, coasters, etc. to your base sheet. 
3. Once you're done setting your paper memories, place the taped-creation in the record album frame or shadowbox. And you're done - Easy as that! 

I am so excited about my framed creations, and can't wait for my next venture abroad so that I can add to the collection! I think I hear Greece and Italy calling....


Sunday, September 4, 2011

Two (Yes, TWO) Ingredient Pumpkin Cake

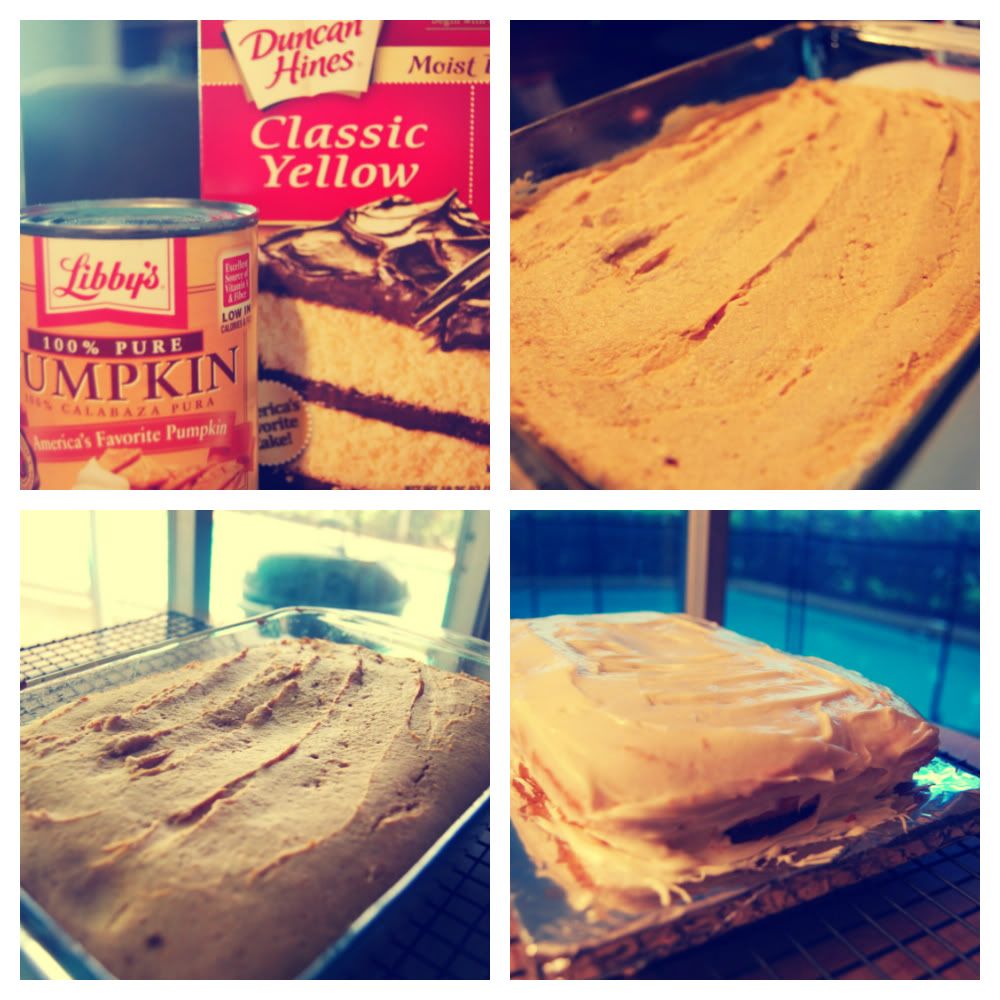
I know what you are thinking. TWO ingredients? Yeah right. Well, believe it or not --  it's true. I stumbled upon this cake on pinterest (via The Big Red Kitchen blog) and knew this had to be my next creation because a) I'm not an avid/very good baker so, uh, yeah, two ingredients? love it b) I LOVE PUMPKIN ANYTHING and c) It's September! Which means I am basically required to create fall-inspired dishes such as this one. I'm home at my parents' house for the weekend, so I figured it was the perfect time to experiment with the people who would give me their honest opinion on this two-ingredient dessert. Needless to say, it was a HIT. 

The Dish?
Pumpkin Cake

The Ingredients?
1 Boxed Cake Mix
1 15-oz. Can of Pumpkin
Frosting/Glaze - optional

The Directions?
1. Mix pumpkin and cake mix on medium speed for two minutes.*
2. Pour into a greased 7 x 11 pan. 
3. Bake at 350 degrees for 28 minutes. 
4. Remove from oven -- let cool.
5. Glaze or frost as desired! 

*This cake created with the above directions is undoubtedly delicious - BUT, I think next time I'd experiment by adding raisins, walnuts and a pinch of pumpkin spice!